
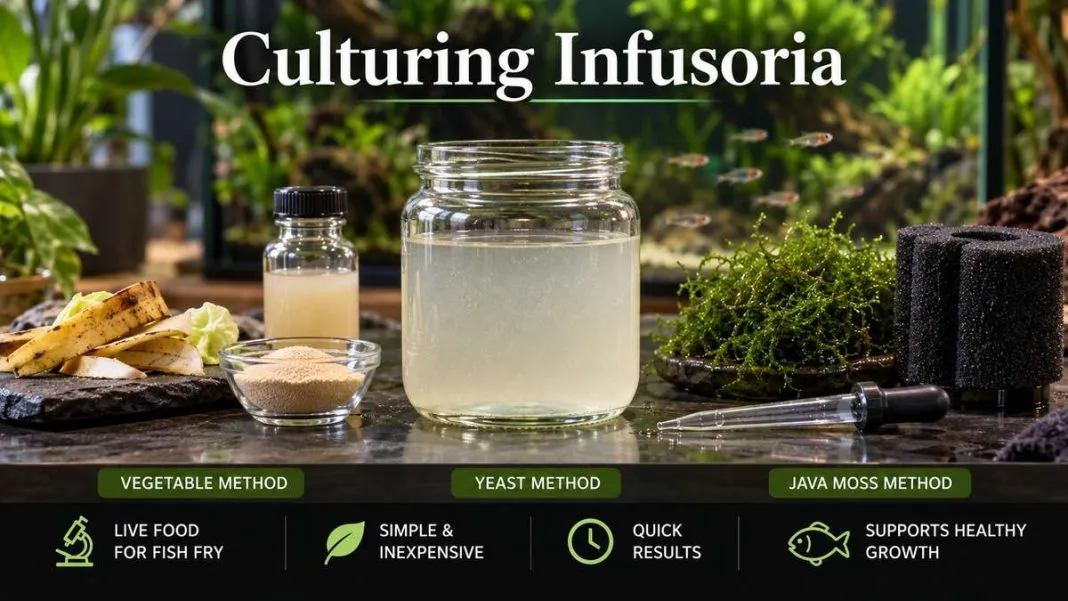

Culturing infusoria provides a readily available source of live food for newly free-swimming fish fry that may be too small to consume newly hatched brine shrimp, microworms or commercially prepared foods. Once their yolk sac has been absorbed, very small fry must begin feeding on microscopic organisms and other small foods within the water column, infusoria can help bridge the gap until they are large enough to consume larger prey.
Infusoria are primarily cultured for small egg-laying species, including bettas, gouramis, rasboras, danios, tetras and small barbs. Their movement through the water column makes them easier for fry to detect than static food particles, although they should generally be considered a transitional food before larger and more nutritionally balanced foods are introduced.
Infusoria can be cultured at home using several simple methods. Yeast can produce a relatively fast culture, while vegetables, aquatic plants and established aquarium water can support cultures over longer periods.
What Is Infusoria?
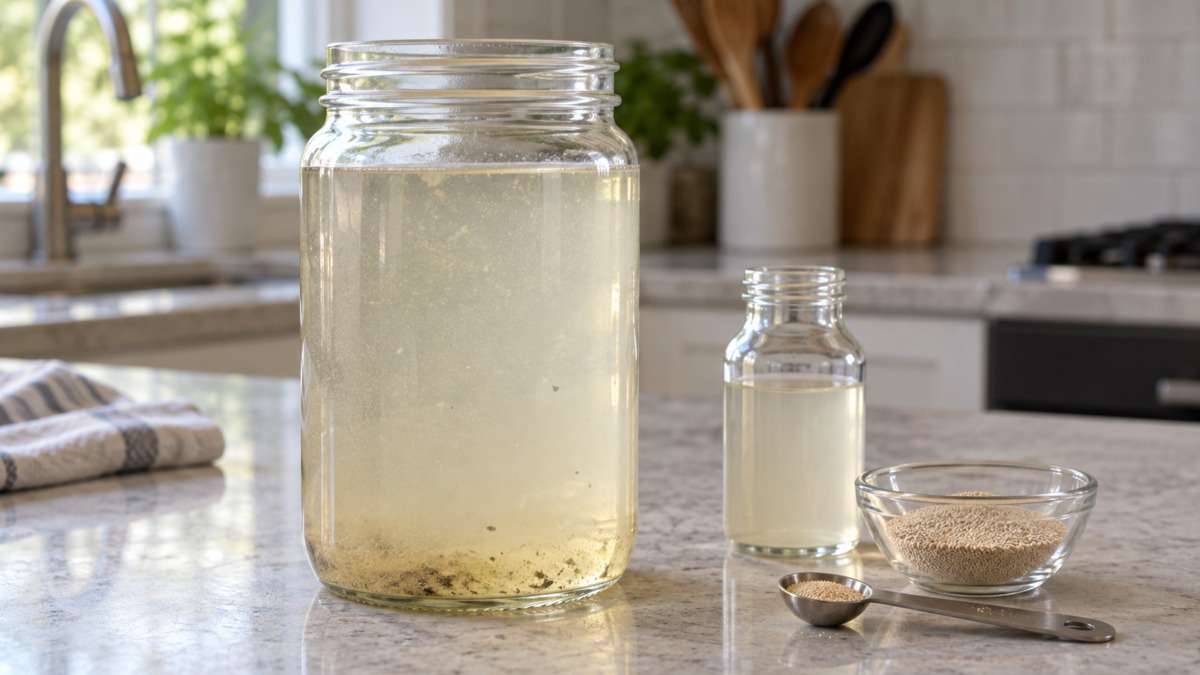
Quick Answer: Infusoria are microscopic organisms found in aquatic environments, particularly ciliates and other microorganisms that can be consumed by newly hatched fish fry. They naturally occur around aquatic plants, biofilm, substrate and mature filter media and can also be cultured as a live source of food for small fry.
Infusoria is a term used to describe microscopic aquatic organisms found in freshwater and marine environments. Historically, organisms associated with infusoria were classified under groups such as Flagellata, Ciliata and Tentaculifera, although modern taxonomy no longer recognizes infusoria as a formal taxonomic group.
Within the aquarium hobby, infusoria generally refers to communities of microscopic organisms cultured as live food for small fish fry. These cultures commonly contain ciliates, including Paramecium, alongside bacteria and other microorganisms.
Ciliates are characterized by cilia, which are microscopic hair-like appendages used for movement, feeding and other cellular functions. Their small size and movement through the water column make many of these microorganisms suitable prey for newly free-swimming fry.
Infusoria occur throughout freshwater, brackish and marine environments, including ponds, lakes, rivers, streams, seas and oceans. In an established aquarium, microorganisms are particularly abundant around aquatic plants, biofilm, substrate, detritus and mature filter media.
Research highlight: A 2023 study found that pikeperch larvae fed the infusoria ciliate Paramecium bursaria during their first 10 days of feeding achieved approximately 80% survival and showed significant growth. The results support small ciliates such as Paramecium as a suitable first live food for some fish larvae.
How to Culture Infusoria
To culture infusoria, start with conditioned water or water from a healthy, established aquarium and provide a source of food that encourages microorganisms to multiply.
Yeast is generally the fastest method and is particularly useful when unexpected fry suddenly require a source of food. Vegetables or banana peel provide a simple household option, while Java moss can support a slower-developing but longer-lasting culture, making it well suited to aquarists planning to breed fish that may require infusoria.
Infusoria cultures generally develop well at warm temperatures around 24–28°C (75–82°F). Most methods follow a similar biological process: bacteria multiply and initially cause the water to become cloudy, then ciliates and other microorganisms feed on the bacteria and reproduce. As their populations increase and consume the available bacteria, the water gradually begins to clear.
Avoid using water or plants collected from outdoor ponds, puddles or other natural water sources to start an infusoria culture. Although these sources may contain infusoria, they can also introduce predatory microorganisms, insect larvae, parasites or other unwanted organisms that may be harmful to fish fry. Water, plants and mature filter media from a healthy, established aquarium provide a more controlled source.
Method 1: Infusoria Culture With Yeast
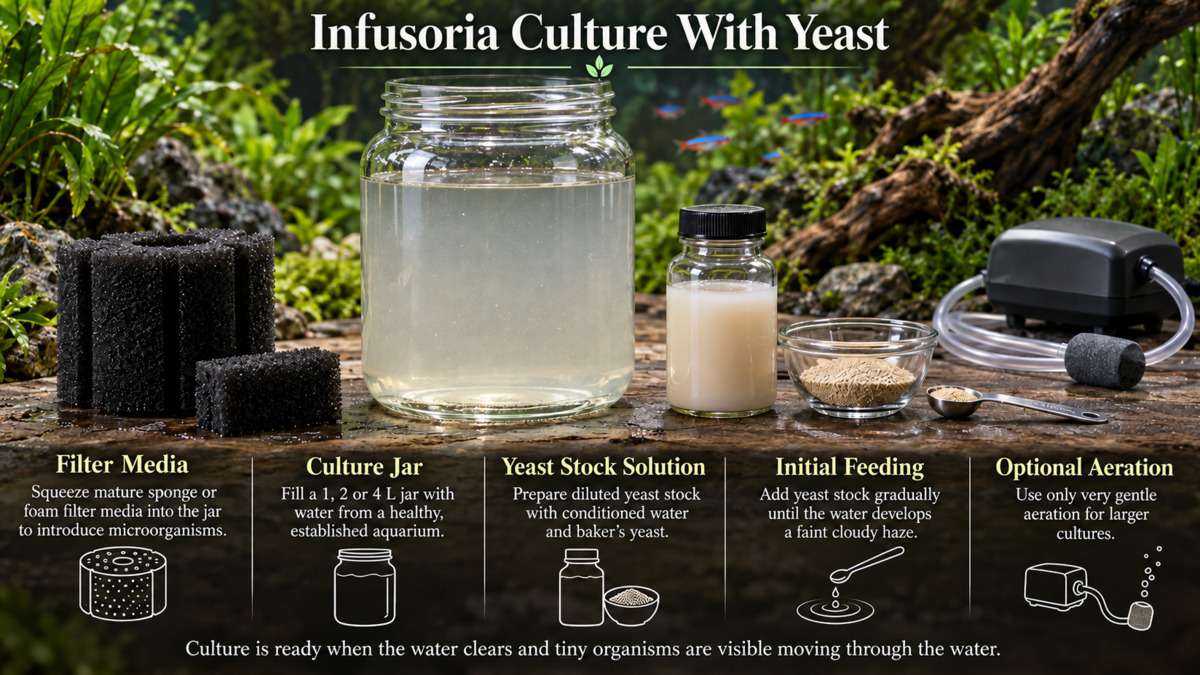
Culturing infusoria with yeast is one of the quickest methods and can be useful when live food is needed within a relatively short period. A culture may begin developing within approximately two days, although establishing a denser, more mature population can take several days depending on temperature, the number of microorganisms initially introduced and other conditions.
You will need:
- A clean 1, 2 or 4 L (0.25, 0.5 or 1 gal) glass container
- Conditioned water and water from a healthy, established aquarium
- Powdered baker’s yeast
- Mature sponge or foam filter media from a healthy aquarium
- A measuring cup or container
- A liquid dropper, syringe or small measuring spoon
- An aquarium air pump, airline tubing and air-control valve (optional)
Choose a 1, 2 or 4 L (0.25, 0.5 or 1 gal) glass container based on the amount of infusoria culture you want to maintain, then fill it with water from a healthy, established aquarium. Remove a mature sponge or piece of foam filter media from a healthy aquarium and gently squeeze it once or twice over the culture. The small amount of brown, debris-rich water released helps introduce additional microorganisms and organic matter without making the culture heavily dirty or dark.
Preparing a Yeast Stock Solution
The small amount of dry yeast needed to feed an infusoria culture can be difficult to measure accurately with ordinary kitchen measuring spoons. To make dosing easier, first prepare a diluted yeast stock solution by mixing powdered baker’s yeast with conditioned water. When preparing the conditioned water, add dechlorinator according to the manufacturer’s recommended dosage for the amount of water being treated.
Choose one of the three batch sizes below based on how much stock solution you want to prepare. Each batch has the same concentration of yeast; only the total amount of stock solution changes.
| Diluted Yeast Stock Solution | Amount of Conditioned Water | Powdered Baker’s Yeast |
|---|---|---|
| Small batch | 50 mL (1.7 fl oz) | ⅛ teaspoon |
| Standard batch | 100 mL (3.4 fl oz) | ¼ teaspoon |
| Large batch | 200 mL (6.8 fl oz) | ½ teaspoon |
Once the Diluted Yeast Stock Solution has been prepared, use the table below to determine how much to add to your 1, 2 or 4 L (0.25, 0.5 or 1 gal) infusoria culture. Use the Initial Yeast Stock Solution amount when first starting the culture. After the water becomes cloudy and then substantially clears, use the smaller Subsequent Feedings amount whenever the culture needs to be fed again.
| Infusoria Culture Size | Initial Yeast Stock Solution | Subsequent Feedings |
|---|---|---|
| 1 L (0.25 gal) | Add 12.5 mL | Add up to 6 mL |
| 2 L (0.5 gal) | Add 25 mL | Add up to 12.5 mL |
| 4 L (1 gal) | Add 50 mL | Add up to 25 mL |
Note: Only add more Diluted Yeast Stock Solution after the previous bacterial haze has substantially cleared. Initial Yeast Stock Solution is added when starting the culture; Subsequent Feedings are added after the haze has cleared.
Add the initial yeast stock solution gradually rather than pouring in the full amount at once. Stop when the culture develops a faint cloudy haze while remaining partially transparent. The quantities listed in the table are maximum amounts, so less may be needed.
Cover and refrigerate any remaining yeast stock solution for later feedings. Shake or stir it thoroughly before each use because the yeast will settle to the bottom, and discard the solution if it develops an unusual odor or shows signs of contamination.
Do not feed the infusoria culture according to a daily schedule. After the initial feeding, the water should become cloudy as bacteria multiply and then gradually clear as ciliates and other microorganisms consume the bacterial population. Once the water has substantially cleared, use the subsequent feedings column in the table above and gradually add yeast stock solution until a faint haze returns.
If the culture remains heavily cloudy, do not add more yeast stock solution. Excess yeast can produce an excessive bacterial bloom, reduce available oxygen and eventually cause the culture to become foul or crash.
Aerating a Yeast Culture
A 1-L culture can generally be maintained without powered aeration if the container has a wide opening and is left uncovered or loosely covered. For 2–4 L cultures, connect aquarium airline tubing to a small air pump and use an air-control valve to reduce the airflow to approximately one or two small bubbles per second. A small air stone can also be used, but only gentle aeration is needed.
Keep the culture around 24–28°C (75–82°F) with indirect or normal room lighting rather than prolonged direct sunlight.
Method 2: Infusoria Culture With Vegetables
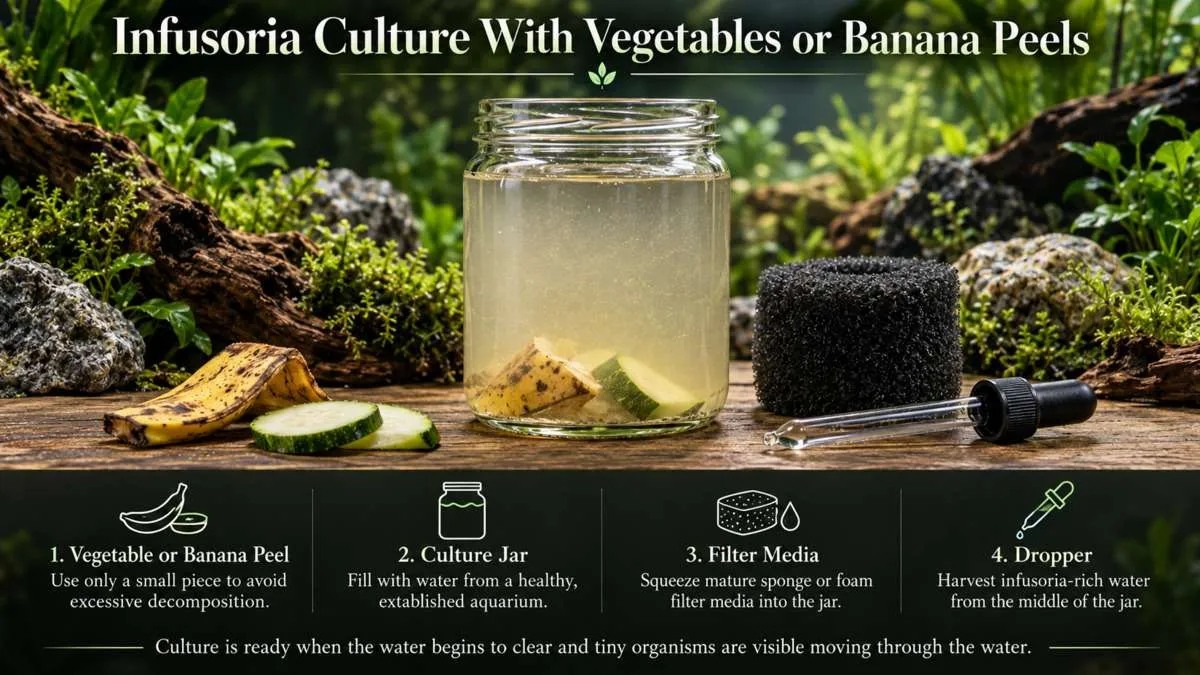
Vegetable cultures are one of the most traditional methods of growing infusoria. As plant matter decomposes, bacteria multiply and provide food for ciliates and other microorganisms. Lettuce, spinach, broccoli, potato or banana peel can be used, but only one type of plant matter is necessary.
For lettuce or spinach, use approximately:
- 1 L: One piece approximately 2–3 cm (1 in) across
- 2 L: Two similarly sized pieces
- 4 L: Three to four similarly sized pieces
For firmer vegetables such as potato or broccoli, use approximately a pea-sized piece per litre of water. For banana peel, approximately 1 × 2 cm (0.4 × 0.8 in) per litre provides a reasonable starting quantity.
These amounts are intentionally conservative because excessive decomposition can rapidly reduce oxygen levels and cause the culture to become foul.
Preparing the Vegetables
Bring water to a boil and remove it from the heat. Place the selected vegetable in the hot water for approximately 1–2 minutes, or pour boiling water over it and allow it to sit briefly. The objective is to soften the plant tissue rather than completely cook it.
Once cooled to room temperature, add the vegetable to a clean container of conditioned or established aquarium water. To introduce microorganisms, gently squeeze a mature sponge or piece of foam filter media from a healthy aquarium once or twice over the container. Do not use filter media from an aquarium experiencing disease, parasites or unexplained deaths.
Keep the container open or loosely covered and place it around 24–28°C (75–82°F) with indirect or ordinary room lighting. Gentle aeration of approximately one or two bubbles per second can be used in larger cultures to improve gas exchange.
Within approximately 1–3 days, the water will become cloudy as decomposition encourages bacterial growth. As ciliates and other microorganisms increase and consume these bacteria, the water should gradually clear.
Do not add more vegetables while the culture remains heavily cloudy. Once the water has substantially cleared and the original vegetables have mostly decomposed, remove any remaining soft or slimy pieces and add approximately half the original quantity. For example, a 2-L culture initially started with two small pieces of lettuce can receive one replacement piece.
An earthy, vegetal or mildly fermented odor can be normal. A strong rotten-egg or sulfur-like smell indicates poor oxygen conditions or excessive decomposition, and a severely foul culture should be discarded and restarted.
Method 3: Infusoria Culture With Java Moss
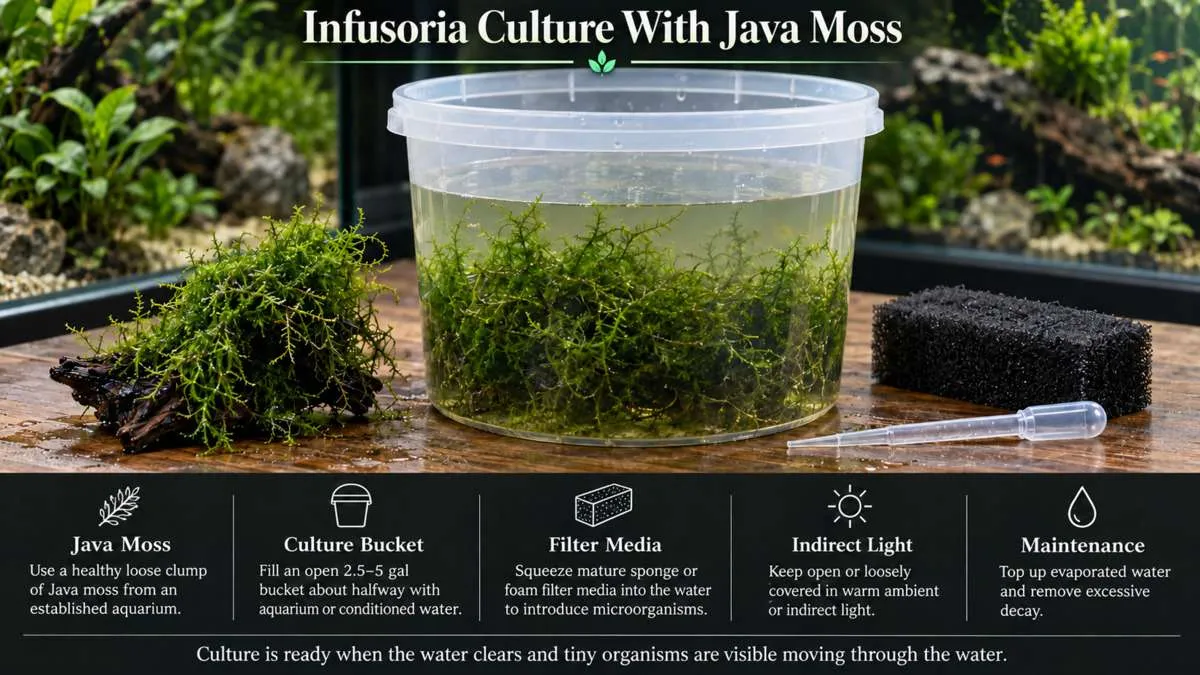
A Java moss culture provides a longer-lasting alternative to heavily fed yeast or vegetable cultures. Living plants, biofilm, bacteria, naturally accumulated organic matter and other microorganisms create a more stable environment that can be useful for aquarists who regularly raise fish fry.
A 2.5–5 gal (9.5–19 L) bucket or similar open container works well. Fill it approximately halfway with mature aquarium water. For a 5-gallon bucket containing about 2.5 gallons (9.5 L), add enough healthy Java moss to loosely cover the bottom of the bucket to a depth of approximately 5–10 cm (2–4 in).
Mosses and other fine-leaved plants from an established aquarium can also be used, although Java moss provides extensive surface area for biofilm. To help establish the culture, gently squeeze mature sponge or foam filter media from a healthy aquarium over the bucket once or twice; avoid intentionally adding large quantities of fish waste, uneaten food or heavily dirty filter water.
Keep the bucket open or loosely covered in a warm location with enough indirect or ambient light to keep the moss healthy. Gentle aeration at approximately one or two bubbles per second is beneficial for a larger culture, but avoid excessive circulation as vigorous aeration is unnecessary.
During the following days, microorganisms already present on the moss and mature filter media begin multiplying while biofilm develops throughout the plant. Some older leaves and fragments of Java moss will naturally die and decompose, providing nutrients that encourage bacterial growth and support the culture. However, the entire mass of Java moss should not be deliberately allowed to rot.
A well-established culture may take approximately one week or longer to develop a substantial population. Once established, replace approximately the same amount of conditioned water as is removed during harvesting and top up water lost through evaporation.
Every few weeks, inspect the moss and bottom of the container. Remove large accumulations of decomposing matter and severely brown or disintegrating moss while leaving healthy green growth and some established debris in place. A properly maintained plant-based culture can remain biologically active for several months, although microorganism density will naturally fluctuate.
How to Tell When Your Culture Is Ready
Because infusoria are microscopic, determining when a culture is ready can be difficult. For yeast and vegetable cultures, the water will initially become cloudy as bacteria multiply. As the infusoria population grows and consumes the bacteria, the water will gradually begin to clear.
Once the water has substantially cleared, allow the container to sit undisturbed for about 30–60 seconds. Hold it against a dark background and shine a bright flashlight into the container. In a well-developed culture, you may be able to see tiny white or translucent specks moving through the water. Individual microorganisms can be difficult to see with the naked eye, but larger populations are usually easier to observe.
Signs of a healthy culture generally include:
- Water that has begun clearing after the initial bacterial bloom
- Tiny moving specks that may be visible under bright light
- A mild earthy, fermented or vegetal odor
- Little or no excessive mold or decaying debris
The culture does not need to appear full of visible organisms before it can be harvested. Water clarity, signs of microscopic movement and the overall condition of the culture are more practical indicators for most hobbyists.
Signs that an infusoria culture may have failed include water that remains extremely cloudy, a strong rotten-egg or sulfur-like odor, extensive surface mold or an excessive buildup of decomposing matter. If these conditions persist, the culture should be discarded and restarted.
Maintaining Your Culture
Maintenance varies slightly between culture methods, but the same basic principle applies: feed according to the condition of the culture rather than a fixed schedule. Avoid continually adding food to cloudy cultures, maintain adequate gas exchange and periodically restart cultures that lose productivity.
Yeast Culture
Once the water has substantially cleared, shake the refrigerated yeast stock solution and add it gradually until a faint haze returns. Do not add more if the culture remains cloudy.
Every 1–2 weeks, replace approximately 20–25% of the culture water with conditioned or healthy established aquarium water while avoiding heavy bottom sediment. If microorganism production declines despite regular feeding, start a fresh container using approximately 10–20% of the healthy existing culture as the starter.
Vegetable Culture
Wait until the water has cleared and most of the previous plant matter has decomposed before feeding again. Remove excessively soft, slimy or moldy pieces and add approximately half the original quantity of fresh plant matter.
If the water becomes dark, heavily opaque or strongly foul smelling, remove the decomposing matter and replace approximately 25–50% of the water. Restart the culture if conditions fail to improve.
Java Moss Culture
Replace approximately the same volume of conditioned water as is removed during harvesting and top up evaporation as necessary. Every few weeks, remove heavily brown moss and excessive sediment while retaining healthy moss and some established organic matter.
Check that the culture continues receiving adequate indirect light and, if used, gentle aeration. Additional organic food is generally unnecessary unless microorganism production becomes noticeably weak.
Keep More Than One Culture
When infusoria will be the primary first food for an expected spawn, maintain two or three cultures started several days apart. Staggered cultures provide different stages of development and prevent a single culture crash from leaving newly free-swimming fry without food.
A younger healthy culture can also be used to start a new culture if an older one becomes contaminated or develops a strong sulfur smell. Periodically starting fresh cultures is generally more reliable than attempting to maintain the same culture indefinitely.
How to Feed Infusoria to Fish Fry

Once the culture is ready, leave it undisturbed for several minutes so heavier particles settle. Use a clean liquid dropper, syringe without a needle or small turkey baster to draw water from the middle or upper water column, avoiding decomposing vegetables, bottom sediment, plant fragments, visible yeast and heavy surface film.
Infusoria cultures vary considerably in concentration, so feeding quantities are only starting points. A visibly dense culture containing abundant microscopic movement can be offered at approximately 5–10 mL per feeding for around 20–100 very small fry, while a lighter culture may require approximately 10–20 mL to provide a similar amount of live prey.
Feed small amounts two to four times throughout the day rather than adding a large volume at once. Fry consuming infusoria may make short darting movements as they capture prey, and their abdominal area may appear slightly fuller after feeding.
Avoid compensating for a weak culture by repeatedly adding large volumes of culture water. For example, 100 mL of a weak culture may introduce considerably more dissolved organic matter without necessarily providing more food than 10 mL of a dense culture. Monitor ammonia, nitrite and general water quality closely, particularly in small fry aquariums where fish are densely stocked and fed frequently.
As the fry grow, begin offering larger foods such as microworms or newly hatched brine shrimp while continuing infusoria during the transition. Once the fry consistently consume the larger food, infusoria can gradually be reduced or discontinued.
FAQs
Can You Culture Infusoria Without a Starter?
Yes. A purchased infusoria starter culture is not required. Infusoria and other microorganisms can be introduced through established aquatic plants, mature filter media and water from a healthy, established aquarium. Using these established sources can accelerate the development of a new culture compared with relying entirely on microorganisms that enter naturally from the environment.
What Is the Best Method for Culturing Infusoria?
There is no single best method for every situation. Yeast cultures generally develop quickly and are particularly useful when unexpected newly hatched fish fry require a source of food within a relatively short period. Vegetable or banana peel cultures are simple to establish using common household ingredients, while Java moss cultures can provide a longer-lasting source of microorganisms when maintained properly.
How Long Does an Infusoria Culture Last?
Culture longevity depends on the method and how it is maintained. Heavily fed yeast or vegetable cultures may require regular refreshing, while more balanced cultures containing plants, biofilm and detritus can remain active for several months.
Microorganism density will fluctuate even when a culture remains biologically active, which is why maintaining multiple cultures is recommended when a reliable food supply is required.
Is Infusoria Good for Betta Fry?
Yes. Infusoria can provide a suitable first live food for newly free-swimming betta fry that are too small to consume larger prey.
As the fry grow, they should gradually transition to larger and more nutritionally substantial foods such as microworms and newly hatched brine shrimp.
Can You Grow Infusoria in an Aquarium?
Yes. Established aquariums naturally contain microscopic organisms associated with plants, biofilm, substrate, detritus and filter media.
Densely planted breeding aquariums, particularly those containing fine-leaved plants and mosses, can provide fish fry with naturally occurring microorganisms. However, a separate culture provides a more dependable supplemental food source when large numbers of fry are being raised.
About Our Aquarium Guides
ForAquarium guides combine scientific literature, established references, and years of aquarium-keeping experience to provide accurate and practical information for aquarists. Information is periodically reviewed and updated as new research becomes available.
Scientific Literature
Fajar Nurul Arifah, Roffi Grandiosa, and Fittrie Meyllianawaty Pratiwy. International Journal of Fisheries and Aquatic Studies 2021; 9(1): 131-134 The enrichment of live feeds: An inquiry for feeding at early stages of fish (Jan 2021)
Jeeva Susan Abraham, S. Sripoorna, Swati Maurya, Seema Makhija, Renu Gupta, and Ravi Toteja. Techniques and tools for species identification in ciliates: a review. International Journal of Systematic and Evolutionary Microbiology (Jan 2019)
S. A. Mitchell. A technique for the intensive culture of Paramecium (group caudatum; Parameciidae) as a first food for ornamental fish fry (Jun 1991)
Thomas Weisse. Thermal response of freshwater ciliates: Can they survive at elevated lake temperatures? (Jul 2024)
Feng Gao, Yang Bai, Yong Chi, Xiaochen Feng, Chunyu Lian, Borong Lu, Xiaotian Luo, Mingzhen Ma, Congcong Wang, Yurui Wang, Zhe Wang, Gongaote Zhang, Saleh A. Al-Farraj, Alan Warren, and Weibo Song. Current status of phylogenetic studies on ciliated protists (Alveolata, Protozoa, Ciliophora) by the OUC-group: advances, challenges and future perspectives (Nov 2025)
Franz Lahnsteiner, Elias Lahnsteiner, and Anna Duenser. Suitability of Different Live Feed for First Feeding of Freshwater Fish Larvae (Apr 2023)
A. W. Mwandya and J. A. Said. Production of Freshwater Infusoria and Blacksoldier Fly Larvae using Various Organic Substrates as Starter Feeds for Fish Larvae (2022)
Isabella Barna and Dale S. Weis. The Utilization of Bacteria as Food for Paramecium bursaria (Jul 1973)
Tomasz Bator. A New Laboratory Cultivation of Paramecium bursaria Using Non-Pathogenic Bacteria Strains (Aug 2010)



I need to to thank you for this excellent read!!
I absolutely enjoyed every little bit of it. I have got you book-marked to look at new stuff
you post…
Greetings from Los angeles! I’m bored to death at work and I stumbled upon this site.
I enjoy the knowledge you provide here and can’t wait to
take a look when I get home.
Greetings! This is my 1st comment here so I just
wanted to give a quick shout out and tell you I truly enjoy reading through your articles.